
1. Make your circles. I traced a small oatmeal canister onto a piece of paper because I can't freehand a decent circle to save my life. Remember that you're going to lose about a half-inch diameter after sewing and turning, so size accordingly. Use your paper pattern to cut two circles for each pocket. (Depending on the weight of you fabric, you may want to use some fusible interfacing on the wrong side of one of the circles to keep your pockets from being too floppy.)

2. Place your two circles right sides together and sew using a 1/4-inch seam allowance. Leave an unsewn gap of an inch or so along the edge so you'll be able to turn it right side out later. Clip all the way around the seam allowance, being careful not to clip into your stitches, but do not clip the part of the seam allowance at the unsewn gap.

3. Turn your circle right side out. Use a chopstick or pencil to poke things into the proper circular shape. Tuck the seam allowance at the unsewn gap in, carefully arranging to blend with the rest of the circle. Iron it all nice and flat.

4. Figure out how much of your pocket you want open at the top. Edge stitch just that part of the circle.

5. Place your pocket on your tunic (or your whatever) and pin in place, with the edge-stitched segment at the top.

6. Sew the pocket to the tunic by stitching close to the edge on the part of the circle you haven't already edge stitched. This makes the circle look like it has an even edge-stitching all the way around, but leaves it attached to the tunic at the bottom and free at the top.

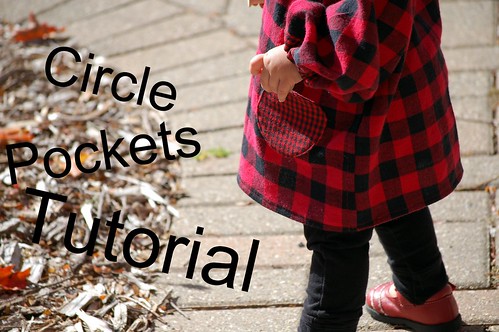
7. Use your awesome pocket for holding awesome stuff.

1 comment:
Adorable! And thanks for the instructions. I think those would be super cute on a hoodie for my little man.
Post a Comment