
In the interest of proving that I have not fallen off the face of the Earth, let me tell you about the holiday cards I made last year. I would tell you about the holiday cards I made this year, but they do not yet (and may not ever) exist.

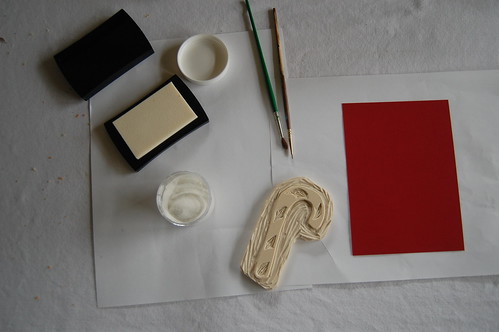
Materials and tools
- Blank cards with coordinating envelopes (Mine were from Paper Source.)
- Ink pad with clear/watermark ink (I used this one from Paper Source.)
- Embossing powder (I used this white powder from Paper Source.)
- Heat source (They make special tools for this, but I just used our toaster. It worked and it didn't cost an extra 20-something bucks.)
- Rubber stamp (I carved my own.)
- Small, soft-bristled paintbrush
- Paint pen (I used a white Sharpie paint pen)
I am messy, so I started by covering the table with paper. I found that the most efficient method for me was to work on three or so cards in a batch, going through all the steps on those three and then starting over again on the next three.
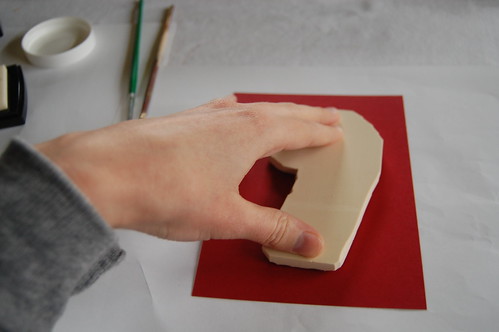
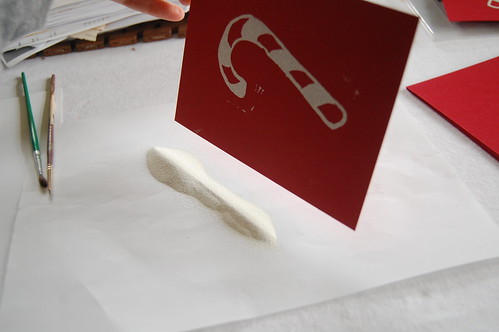
Lay out your cards face-up. Press your stamp firmly onto the ink pad. Carefully but firmly press the inked stamp onto the front of each card.
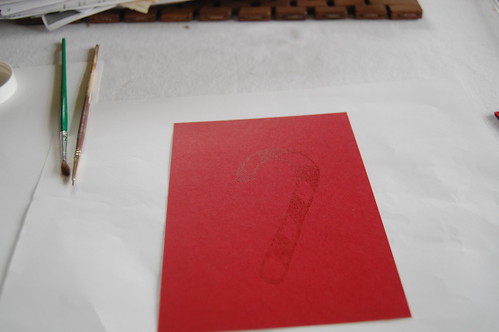
Sprinkle the embossing powder generously over the stamped area, making sure to cover the entire design. Then pick up the card and let the excess powder fall onto a piece of paper (you can reuse this powder on the remaining cards! otherwise you will go through it like crazy!). Tap the card gently to shake off even more of the excess powder. You should be able to see your design now, coated with the embossing powder.
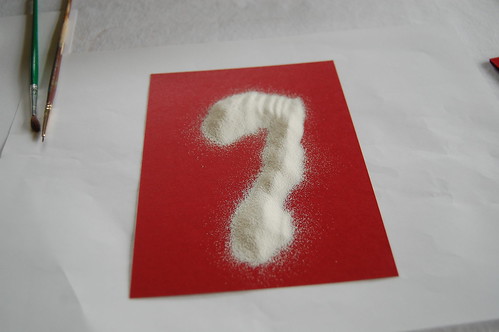
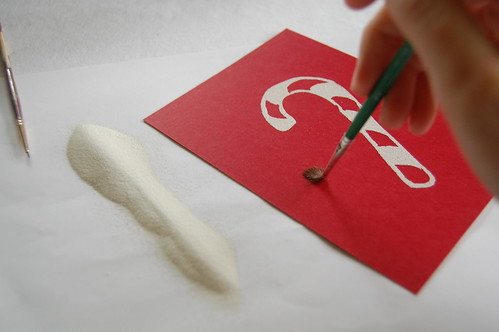
If there are stray spots of embossing powder on the card, take the paintbrush and very carefully brush the stray spots away. But remember that perfection is not the goal: I think a few stray flecks here and there add to the homemade charm.
Now for the fun part: adding the heat! I gently set one card at a time on my toaster, rotating it a bit to make sure all the embossing powder melted evenly. Be careful with the rotating, because the card is going to get a bit hot (because, you know, that is the point). Obviously, using one of the special heating tools is probably safer and easier, but a toaster works in a pinch. Just really keep an eye on things. It only takes a few seconds to melt the powder, and you don't want your cards to catch on fire or anything. You'll know when it's done because the powder will melt and look all awesome and shiny and embossed.
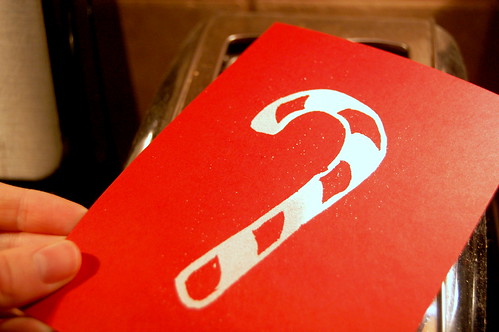
Carefully set the cards aside to cool.
When the cards are cool and the embossing is all set, use a paint pen to write your cheery holiday message on the back (or inside, if you do folding cards instead of flat cards).
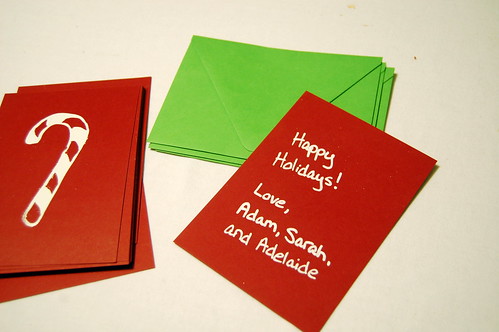
Admire your delightful handiwork. Eventually, tear your self away from the self-congratulatory party you are throwing in your head and send the cards off to your friends and relatives.
3 comments:
Super cute! I tried embossing powder once and had the darnedest time getting it to work right. These look awesome though!
I love these cards - I have one on my bulletin board here. The toaster tip is excellent - those heating tools are very expensive and let me tell you DANGEROUS. I have almost set many things on fire and imperiled my hands. The toaster is a much safer heater! You can always add a set of tongs to the process if things are getting too toasty.
Thank you both!
I must admit that using tongs while toaster-heating the cards never even occurred to me. But that is a great idea, obviously. I'll file that tip away for next time!
Post a Comment